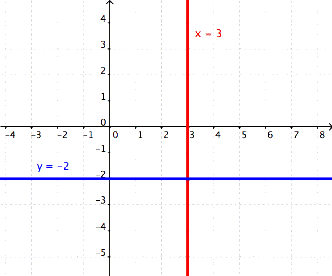
Graphing linear equations
When it comes to graphing linear equations, there are a few simple ways to do it. The simplest way is to find the intercept values for both the x-axis and the y-axis. Then just draw a line that passes through both of these points. That line is the solution of the equation and its visual representation. The most appropriate form for this is the slope-intercept form, since it is the easiest one to get the information about intercept values from. Problems that can occur with this approach to graphing linear equations happen when you have almost vertical or almost horizontal lines. In these cases the intercept values will be very high and very difficult to draw. The second approach is just a bit different. Instead of intercepts, choose low values for one of the coordinates (for example: x = 1, 2, 3…) and calculate the other coordinate using these values.
We will use an example to give you a little demonstration. Let us say you have to draw the graph of this equation:
y = 6x + 2
We will first calculate the y-intercept by setting the value of x at 0 and then calculate the x-intercept by setting the value of y at 0.
y = 6*0 + 2
y = 2
0 = 6x + 2
6x = -2 |:6
x = -1/3
So, the intercept value for the y-axis is 2 and for the x-axis is (- 1/3). The only thing left to do is to draw a line that passes through these two points and you found the solution.
Now, let us try the other approach to graphing linear equations. We will use the same equation as before, but this time we will try to calculate the value of one coordinate using predetermined values of the other coordinate. Since y is so much larger than x, we will insert different values of x into the equation (in order to avoid dealing with fractions). We will choose x = 1 and x = (0) in this situation.
y = 6x + 2
If (x = 1),
y = 6*1 + 2
y = 8
If (x = 0),
y = 6*0 + 2
y = 2
So now we have two points – P1 (1, 8) and P2 (0,2). All that is left to do is to draw the line passing through these two points.
The same procedure is used when graphing inequalities. The only difference is that the solution of the equation is not necessarily the line itself, but the area over or under the line. That depends on the sign of inequality. In this table, we will give you a short overview of the possible solutions. The three dots represent all of the elements on the other side of the expression.
| Inequality | Solution |
| y > … | The area above the line |
| y < … | The area under the line |
| y ≥ … | The area above the line and the line itself |
| y ≤ … | The area under the line and the line itself |
| x > … | The area to the right of the line |
| x < … | The area to the left of the line |
| x ≥ … | The area to the right of the line and the line itself |
| x ≤ … | The area to the left of the line and the line itself |
These are the basic rules to graphing linear equations and linear inequalities. If you wish to practice graphing linear equations, please feel free to use the math worksheets below.
Graphing linear equations and inequalities exams for teachers
| Exam Name | File Size | Downloads | Upload date |
|
Equations
|
|||
| Graphing linear equations – very easy | 545.9 kB | 15174 | September 3, 2019 |
| Graphing linear equations – easy | 541.3 kB | 16639 | September 3, 2019 |
| Graphing linear equations – medium | 518.5 kB | 22046 | September 3, 2019 |
| Graphing linear equations – hard | 558.9 kB | 11924 | September 3, 2019 |
| Graphing linear equations – very_hard | 708.7 kB | 8338 | September 3, 2019 |
|
Inequalities
|
|||
| Graphing linear inequalities – very easy | 557.2 kB | 4718 | September 3, 2019 |
| Graphing linear inequalities – easy | 542.1 kB | 4148 | September 3, 2019 |
| Graphing linear inequalities – medium | 719.7 kB | 4671 | September 3, 2019 |
| Graphing linear inequalities – hard | 716.1 kB | 3784 | September 3, 2019 |
Graphing linear equations and inequalities worksheets for students
| Worksheet Name | File Size | Downloads | Upload date |
| Graphing linear inequalities | 9 MB | 5303 | September 3, 2019 |
| Graphing linear equations | 17.1 MB | 9168 | September 3, 2019 |